ROS Packages
official guide: https://docs.ros.org/en/humble/Tutorials/Beginner-Client-Libraries/Colcon-Tutorial.html
So far we have made multiple files and our folder is getting messy.
Let’s structure our project by using ROS Packages.
What are ROS Packages?
ROS Packages are, as the name implies, packages of code that are highly sharable between ROS developers.
They consist of a folder, package.xml file, and source code
        cpp_package_1/
		      ... imagine much code files here ..
          package.xml
First, we need to create a ROS workspace.
We do this by making 2 folders one inside another. I am calling my workspace ros_ws and the folder inside it src
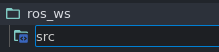
Then inside this src folder is where we put all of our packages.
  ros_ws/
    src/
      cpp_package_1/
		      ...
          package.xml

      py_package_1/
		      ...
          package.xml

      ...
      cpp_package_n/
		      ...
          package.xml
package types
packages can be either C++ or python.
the intern file structure is different for each but for this guide we will stick to creating python packages
Creating a package
Let’s go to the src folder to create the package
cd ros2_ws/src
to create a package we use this command:
ros2 pkg create --build-type ament_python --license Apache-2.0 --node-name my_node my_package
a bunch of text should have been printed out but the result should look something like this:
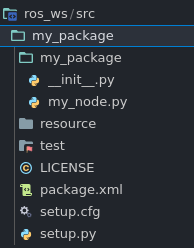
What’s inside a python package
package.xmlfile containing meta-information about the packageresource/<package_name>marker file for the packagesetup.cfgis required when a package has executables, soros2 runcan find themsetup.pycontaining instructions for how to install the packagemy_package- a folder with the same name as your package, used by ROS 2 tools to find your package, contains__init__.pymy_node.pyan example node file (how nice of them)
Let’s move all of our code into the my_package/my_package folder (this is next to the my_node.py file)
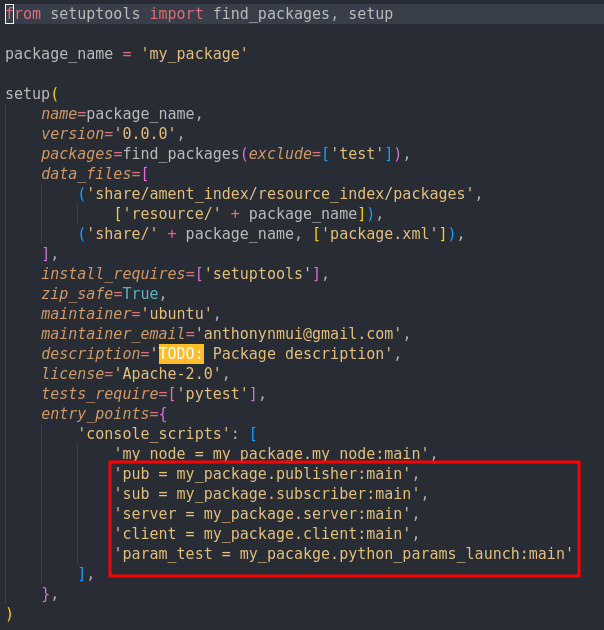
To register all the new files we added open setup.py and put in the following:
Now back in the command line make sure you are in the ros_ws folder!!!
let’s build our package with colcon build --symlink-install

what is building?
if you are a CS major at Rose-Hulman you will learn the answer to this in CSSE132
but TLDR; is it combines all the code files into one program that can be run easily
Then in a new terminal go into the ros_ws folder with cd ros_ws and run source install/setup.sh.
From now on whenever you open a new terminal you must run source install/setup.sh in the workspace folder. This lets you run the ROS command
Then to run say our publisher.py file we do ros2 run <package name> <file_name>

remember to run source install/setup.sh for the subscriber!!!

and congrats you have successfully setup your own ROS package.
Sidenote:
running colcon build --symlink-install has created other folder build, install, and log
for the most part, these can be ignored.
Exercise!!!! ( ik u love them )
- try running the server and client setup but with in the enviroment
- Create a new package called
server_client_pkgand copy theserver.pyandclient.pyfiles in there. Then build and run the two files.