Nav2 pt6 Path finding
This part of the guide shows how to finally add Nav2 to our setup.
Install
  sudo apt install ros-$ROS_DISTRO-navigation2
sudo apt install ros-$ROS_DISTRO-nav2-bringup
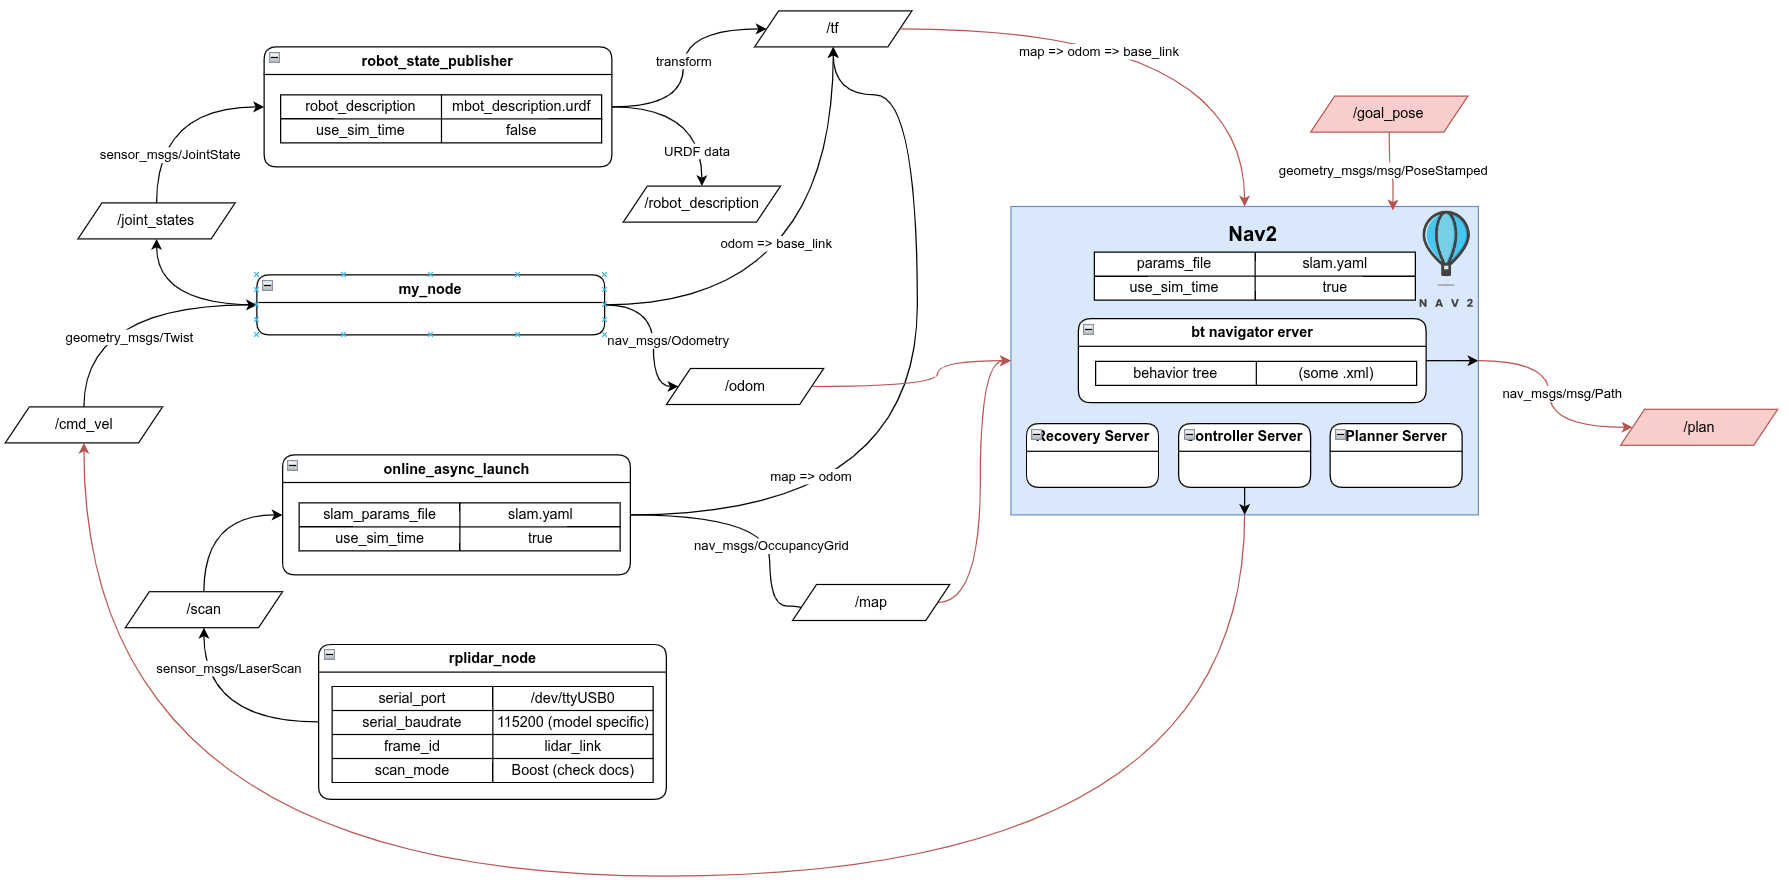
New Node nav2_bringup
nav2_bring up actual spawns a lot of nodes and topics but I have just shown a few of the important ones.
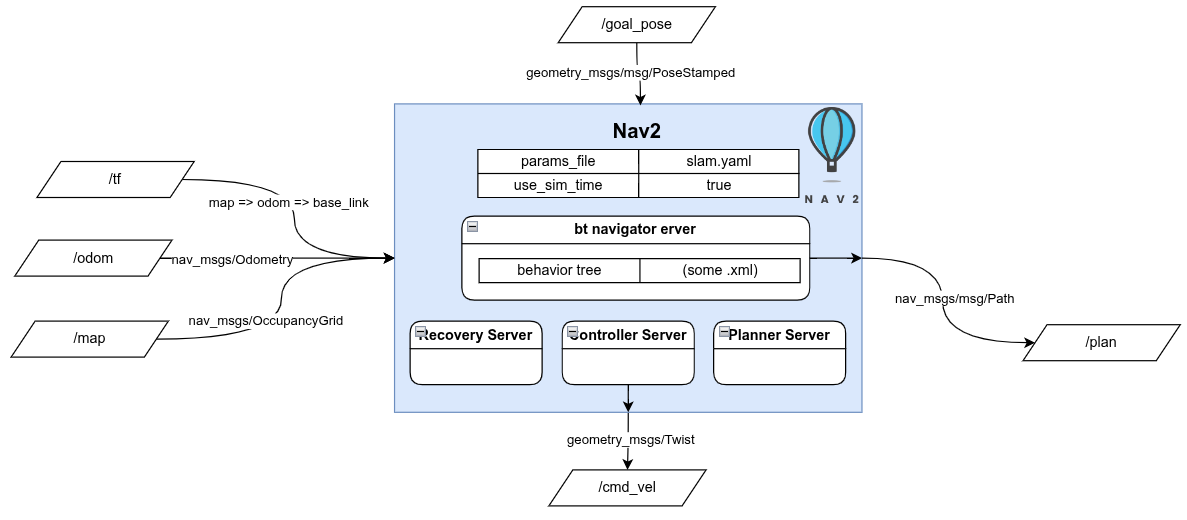
Inputs:
| Name | Type |
|---|---|
/tf | map ⇒ odom ⇒ base_link |
/odom | nav_msgs/Odometry |
/map | nav_mesgs/OccupancyGrid |
/goal_pose | geometry_msgs/PoseStamped |
Outputs:
| Name | Type |
|---|---|
/plan | nav_msgs/msgPath |
/cmd_vel | geometry_msgs/Twist |
Params:
| Name | Type |
|---|---|
params_file | file |
use_sim_time | bool |
description:
/odom, /map, and map => odom => base_link tells Nav2 where the robot is
/goal_pose is where the robot wants to go
/plan is the path generated to get to that point
/cmd_vel actual moves the robot’s wheels
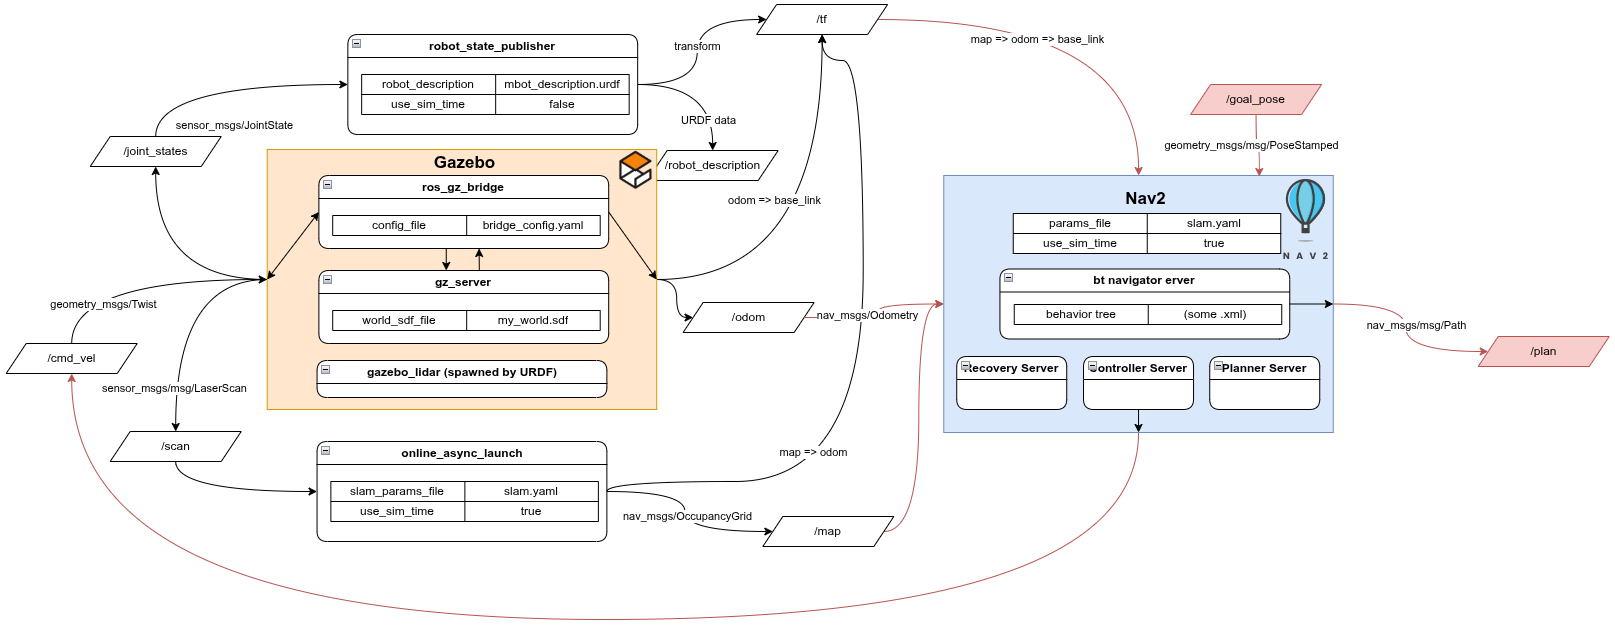
Gazebo
New node diagram
Download the nav2_params.yaml in the config folder. Later we will fine tune it for our robot.

colcon build --symlink-install
Remember to enable Gazebo again in the launch file
in 2 different terminals run:
ros2 launch mbot_pkg display.launch.py use_sim_time:=true
ros2 launch nav2_bringup navigation_launch.py use_sim_time:=true params_file:=<path/to/nav2_params.yaml>
To know if nav2_bringup ran correctly, in logs wait for “Creating bond timer”
rviz
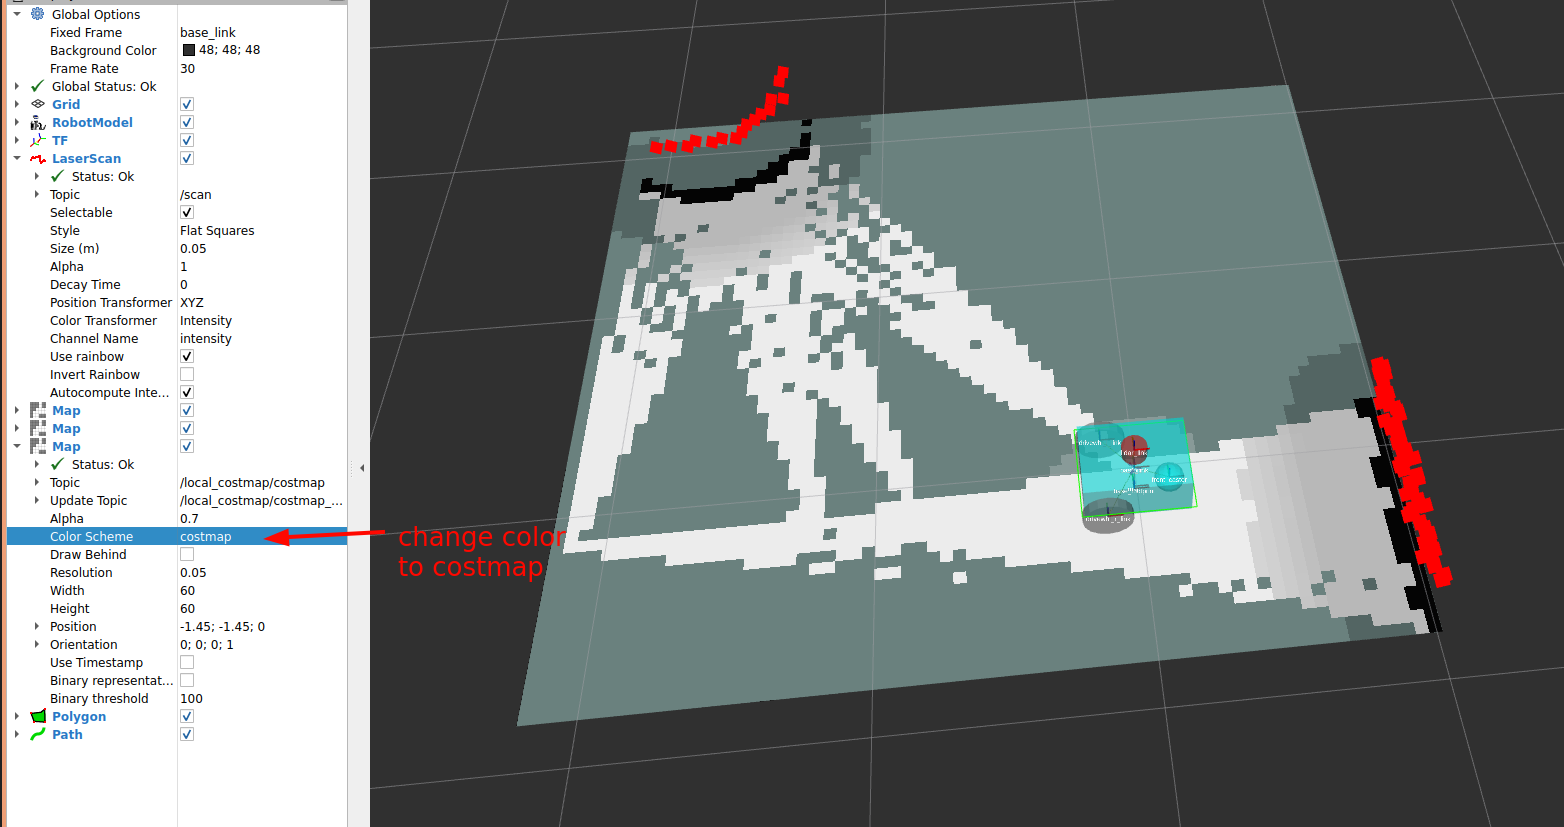
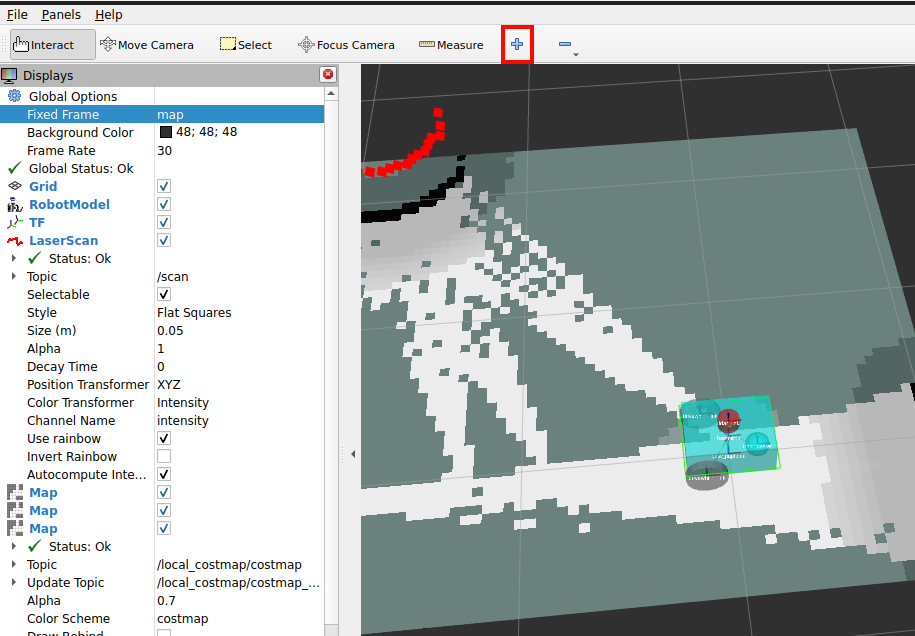
YOU MUST HAVE MAP SELECTED AS FIXED FRAME OR ELSE NOTHING WILL WORK!!!
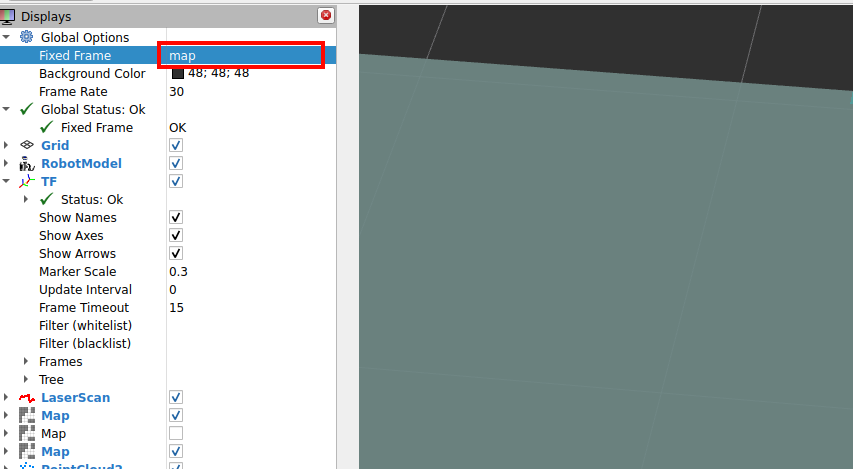
you will probs get an error looking like this:

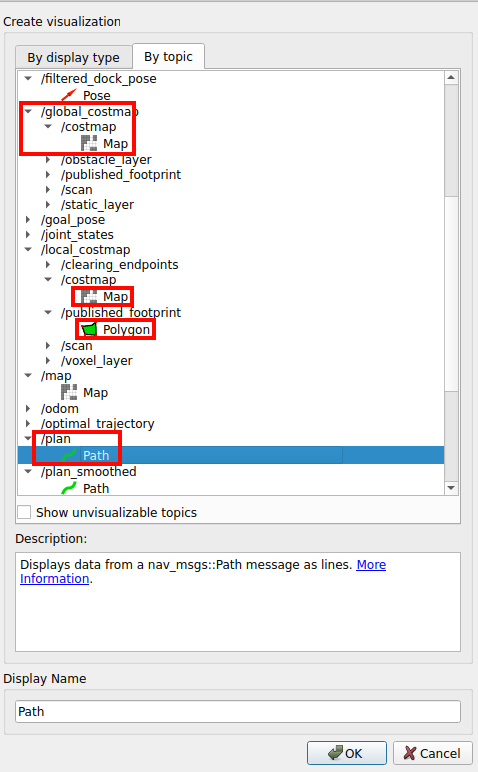
Definitely recommend adding other visualizations such as:
- /cmd_vel_nav
- /goal_pose
Result:
Publishing Goal pose
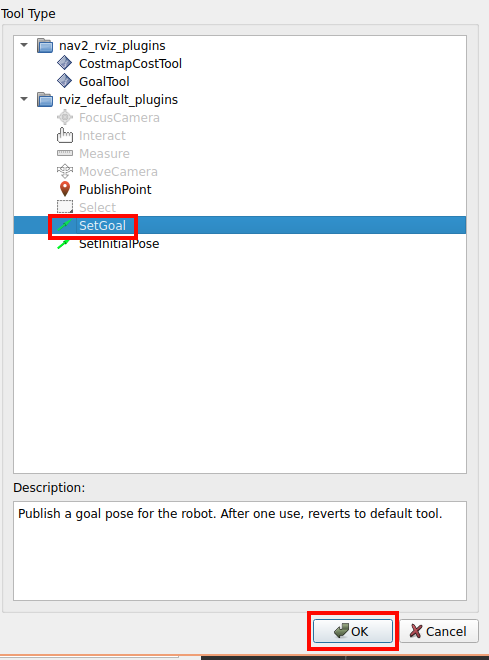
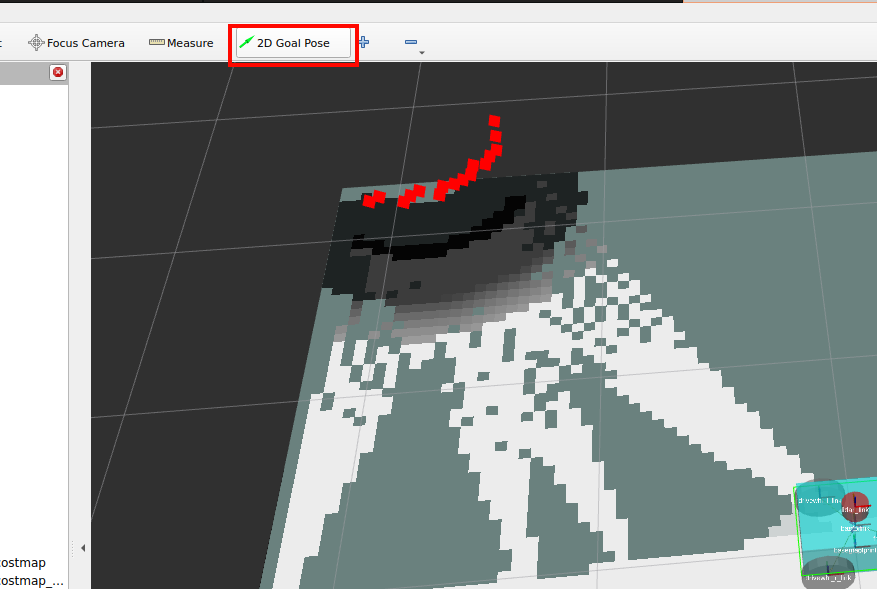
click and drag anywhere on the map to put the goal of where the robot should go to
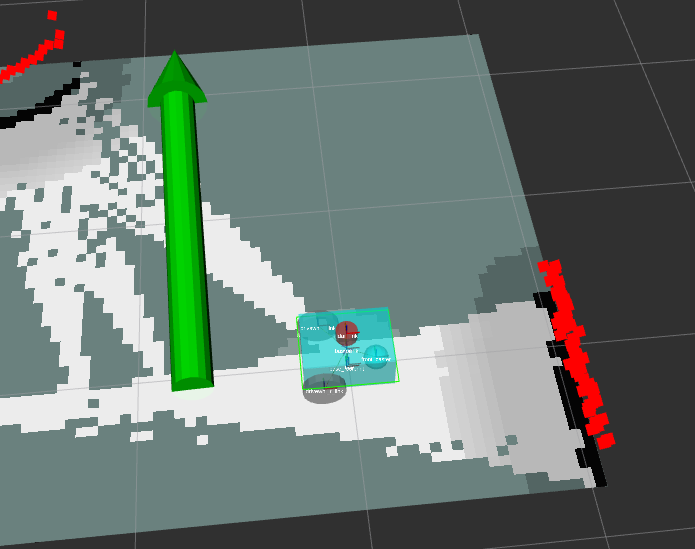
This publishes a message to /goal_pose
The robot should then start to automatically move to that spot
ctrl+s to save everything
Physical
New node diagram
Remember to disable Gazebo again in the launch file
in 2 different terminals run:
ros2 launch mbot_pkg display.launch.py
ros2 launch nav2_bringup navigation_launch.py use_sim_time:=true params_file:=**path/to/nav2_params.yaml**
You should be able to publish a goal pose in rviz like in the section above
If you need your robot to autonomously put goal poses down, such as a match start in Robomasters, you just need to publish geometry_msgs/PoseStamped on /goal_pose inside of my_node
Adding nav2_bringup to launch file
def generate_launch_description():
    pkg_share = get_package_share_directory('mbot_pkg') # gets the location of mbot_pkg
    default_model_path = os.path.join(pkg_share, 'description', 'mbot_description.urdf') # gets the location of the urdf
    default_rviz_config_path = os.path.join(pkg_share, 'rviz', 'config.rviz') # gets the location of the rviz config
    bridge_config_path = os.path.join(pkg_share, 'config', 'bridge_config.yaml') # gets location of gazebo config
    world_path = os.path.join(pkg_share, 'world', 'my_world.sdf') # gets the gazebo world file
    slam_yaml_path = os.path.join(pkg_share, 'config', 'slam.yaml') # gets the slam config file
    nav2_yaml = os.path.join(pkg_share, 'config', 'nav2_params.yaml') # gets the nav2 config file

     ...

    nav2_bringup_node = IncludeLaunchDescription(
        PythonLaunchDescriptionSource([
            FindPackageShare("nav2_bringup"), '/launch', '/navigation_launch.py']),
        launch_arguments={
            'params_file': nav2_yaml,
            'use_sim_time': LaunchConfiguration('use_sim_time')

        }.items()
    )

    return LaunchDescription([
        DeclareLaunchArgument(name='use_sim_time', default_value='False', description='Flag to enable use_sim_time'),
        # joint_state_publisher_gui_node, # debugs urdf joints
        my_node, # swaps joint_state_publisher_gui_node for physical robot
        robot_state_publisher_node, # publishes urdf to ROS
        rviz_node, # starts rviz

        # stuff to start gazebo
        # ExecuteProcess(cmd=['gz', 'sim', '-g'], output='screen'),
        # gz_server,
        # ros_gz_bridge,
        # spawn_entity,

        lidar_node # lidar for physical setup

        slam_toolbox_node, # providing the map => odom transform.

        nav2_bringup_node, # starts nav2

    ])
If you have gotten to this part of the guide:
🎉CONGRATS YOU GOT NAV2 WORKING 🎉
However, now there is a lot more tuning that needs to be done
Tuning Nav2 settings
Depending on what your final robot looks like you should change the footprint and robot_radius parameter. These were the green outline in rviz around the robot and are used to calculate the path finding on the 2D map.
All the other settings in the nav2_params.yaml also need to be tuned because the nav2_bringup_node launches multiple nodes each with many parameters. Here is a general guide from the official nav2 docs that goes over what each node does and how to tune them. However, the next guide will go a little more indepth on how to better turn the nav2_param.yaml file.