Getting started with ROS2
TODO: add wsl install
Step 1:
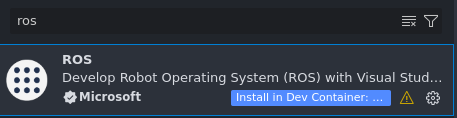
Install vscode and download Remote Development plugin:

Step 2:
Create a folder called ros2_ws somewhere on your computer and open that folder in vscode by going to File → open folder
ctrl+shift+p and type: Install Docker

The Docker install will take sometime and at the end it will ask you to restart
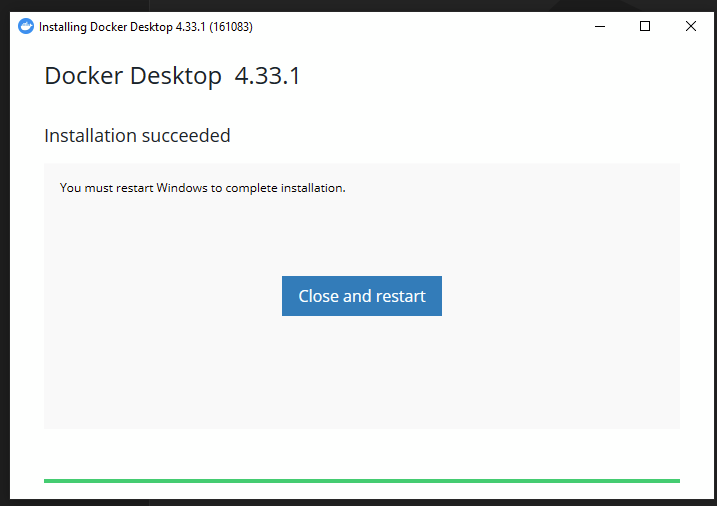
Once you restart open Docker and finish the installation
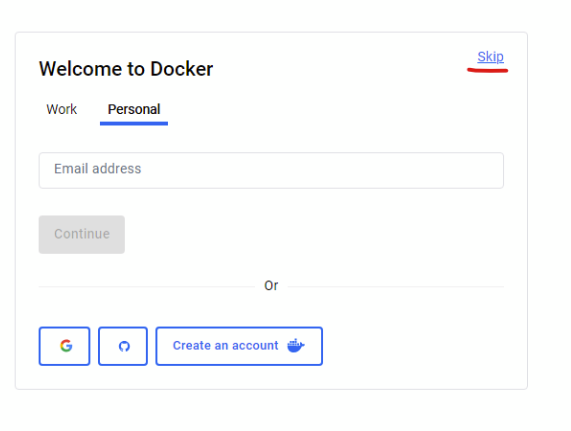
It will ask you to make an account but you can just press skip on the top right
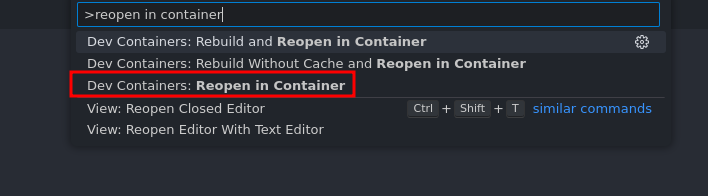
Then reopen vscode and open the ros2_ws folder you just made
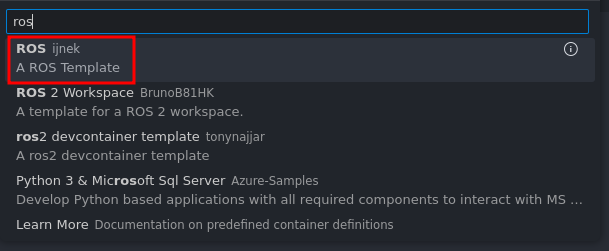
press ctrl+shift+p and type: reopen in container
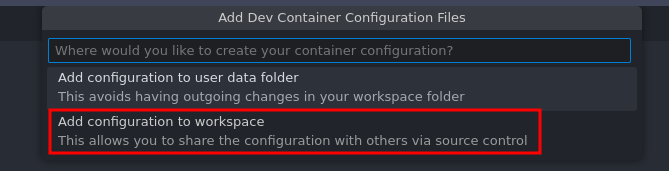
Choose “Add configuration to workspace”


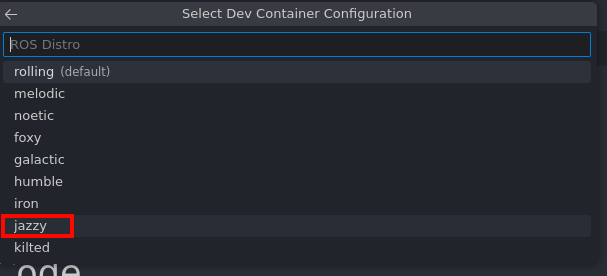

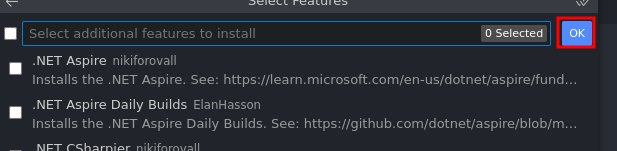
vscode will now install ROS2 onto your computer so this may take some time.
Step 3:
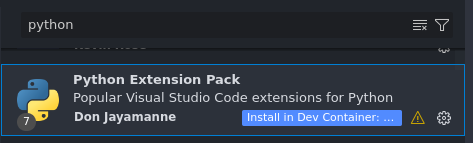
Once ROS2 has installed inside your dev-container I recommend you install these two plugins:
Step 4: add to .bashrc
In the Docker file inside the .devcontainer folder add this line at the very bottom:
  RUN echo "source /usr/share/colcon_argcomplete/hook/colcon-argcomplete.bash" >> ~/.bashrc
RUN echo "source /usr/share/colcon_cd/function/colcon_cd.sh" >> ~/.bashrc
RUN echo "export _colcon_cd_root=/opt/ros/humble/" >> ~/.bashrc
RUN sudo apt install -y python3-pip
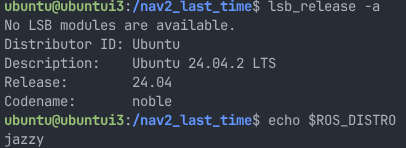
To test if everything installed correctly open a terminal with ctrl+shift+p and typing toggle terminal:

then
Then type lsb_release -a and echo $ROS_DISTRO in the command prompt and you should get similar responses:
Install: to get displays to pass over
sudo apt install xcb
After installing xcb in the container outside of the container run:
xhost +local:
to test if windows forward run in the container:
rviz2
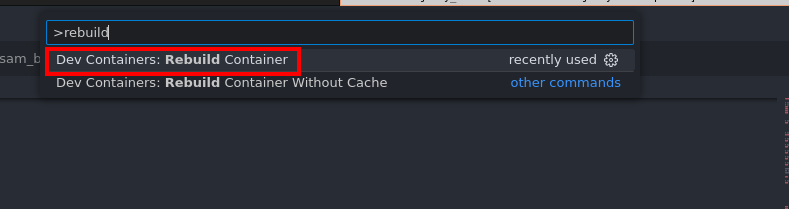
Note: you may have to rebuild the container if rviz2 does not popup:
Press ctrl+shift+P and type rebuild
video guide if you get stuck: https://www.youtube.com/watch?v=dihfA7Ol6Mw&t=650s
Now you should be setup and should move onto the next guide
how do I reopen my container?
TODO: